Ternary Ordered Dither
Suppose I have an image and I want to reduce the number of colors in it.1 How can I go about this? I’m including ImageMagick commands throughout, but they aren’t necessary to follow.
Grayscale Images
The simplest and oldest form of this problem is reducing the number of grays in an image, in these examples to only two colors: black and white.

Thresholding
I can represent every pixel as a value from 0 (black) to 1 (white). Then if it’s greater than 0.5 (closer to white than to black) I replace it with 1, and if it’s less than 0.5 (more black than white) I replace it with 0.
$ magick couple.tiff -threshold '50%' couple_threshold.png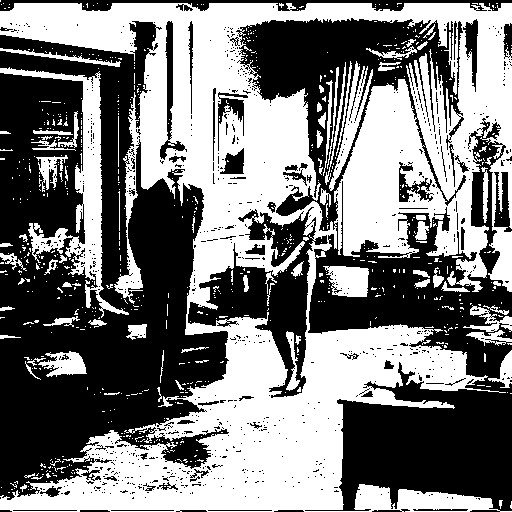
As you can see, the results aren’t great. The edges of our people and objects have disappeared and there are large fields of solid black and white in previously unremarkable areas. Here’s what’s happening underneath, represented visually.
$ magick -size 20x640 gradient: -rotate 90 gradient.png
$ magick gradient.png -threshold '50%' gradient_threshold.png![]()
![]()
Despite its obvious shortcomings, this idea of “finding the closest color” or equivalently “dividing the color space” is the final step in all the other methods I’m looking at, so it’s worth starting here.
Random Thresholding
The division between black and white is clearly a little too sharp. What if we changed the threshold to a random number from 0 to 1 for each pixel? On average the threshold is still 0.5, but it’s a little less unforgiving.
$ magick couple.tiff -fx 'u+0.5-rand()' -write couple_noise.png -threshold '50%' couple_threshold_0x100.png Our test image with a random dither.
In order to keep the thresholding simple, I’ve actually done something slightly different: I’ve shifted the random noise to the range of -0.5 to 0.5, and added it to the image. This produces an intermediate image that may be instructive.
 Our test image with noise applied, pre-thresholding.
This is honestly not very good at all for this test image. If you squint, some of the darker objects have more definition and detail, but we’ve almost entirely erased the woman of our couple. What’s more, even in areas that are definitely completely black, we can still see occasional white pixels by chance. Odd clumps and gaps in the noise can obscure and create detail unpredictably; what has happened to our bouquet of flowers?
Some simple tweaks can help with this. We can let the blackest blacks stay black and the whitest whites stay white, only dithering the middle.
$ magick couple.tiff -fx 'u+0.3-rand()*0.5' -threshold '50%' couple_threshold_5x55.png Our test image randomly dithered between 5% black and 55% white.
To get a clearer look at what’s happening here, lets look at our gradient again.
$ magick gradient.png -fx 'u+0.5-rand()' -threshold '50%' gradient_threshold_0x100.png
$ magick gradient.png -fx 'u+0.3-rand()*0.5' -threshold '50%' gradient_threshold_5x55.png![]()
![]()
![]()
I had to choose the threshold ranges manually, which isn’t ideal. It’s also worth mentioning that the pattern is non-deterministic. Suppose we wanted to dither the frames of an animation, then we would see the noise “crawl” around in each frame and we wouldn’t get very good compression at all.
$ magick gradient.png \
    \( +clone \) \( +clone \) \( +clone \) \( +clone \) \( +clone \) \
-random-threshold '0x100%' -set delay 25 gradient_noise_anim.gif![]()
Aside: ImageMagick’s Random Threshold
The -fx operator is not quite the same as the built-in -random-threshold operator, although it is very similar. The -fx operation I have been using “squishes” the full range of noise into the space between white and black, while the built-in seems to “overwrite” those regions. I didn’t dig deeper, mostly because I’m trying not to dwell on random dithering for too long. (Concerningly though, my percentage calculations seem to be slightly off in the above examples.)
magick gradient.png -random-threshold '0x100%' gradient_rt0x100.png
$ magick gradient.png -fx 'u+0.5-rand()' -threshold '50%' gradient_fx0x100.png
$ magick gradient.png -random-threshold '5x80%' gradient_rt5x80.png
$ magick gradient.png -fx 'u+0.425-rand()*0.75' -threshold '50%' gradient_fx5x80.png![]()
![]()
![]()
![]()
Ordered Dithering
Instead of thinking in black and white, what if we added a gray? Obviously adding a third color isn’t allowed, but at a distance, a black and white checkerboard pattern looks about right.
 A field of checkerboard pattern that we will be using to approximate gray.
In principle, we can think of this as thresholding to three colors and then mapping the middle one to a pattern. As described that would be an expensive and difficult operation, but it’s actually equivalent to the math we’ve already been doing! We can subtract our checkerboard pattern, then apply the binary threshold as before.
P2
2 2
3
1 2
2 1
This is our dithering pattern in a text-based image format called a Portable Graymap. Note that although the possible values are from 0 to 3, we only use 1 and 2. So when we use it in the -fx expression later, it will alternate between ⅓ and ⅔.
$ magick couple.tiff checks.pgm -virtual-pixel tile -fx 'u+0.5-v' -threshold '50%' couple_checks.png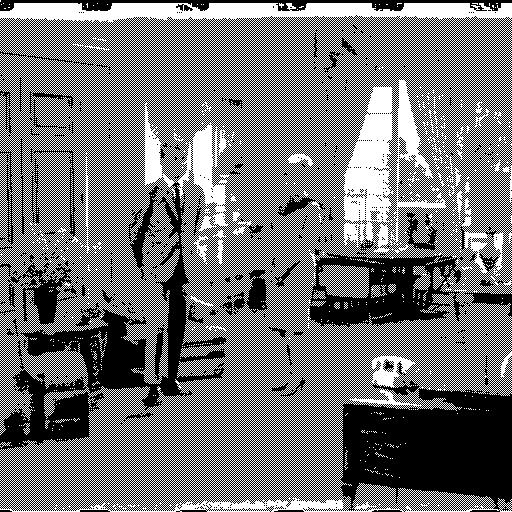
![]()
This is perhaps not much better than the (hand-tuned) random dither in terms of actual detail, but it’s much easier to look at. Still, we can do better.
With a larger pattern, we can add more “pseudo colors” and make a smoother image. The most common of these patterns are called Bayer matrices,2 and they may look familiar. ![]()
We can “stack up” the patterns and represent them as a single “threshold map” to apply them the same way as the checks. The PGM file is easier to use, but here I have blown it up as a PNG to illustrate.
 The 'threshold map' of an 8x8 Bayer matrix. Note that there is no purely white or purely black pixel.
$ magick couple.tiff o8x8.pgm -virtual-pixel tile -fx 'u+0.5-v' -threshold '50%' couple_o8x8.png
 Our test image with an 8x8 Bayer matrix dither.
Color Dithering
Suppose we have three colors now: Red, Green, and Blue, and we want to reduce a color image to only this palette.
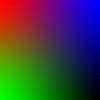
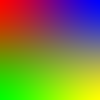
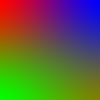
 We'll need a new test image for color. This one is from the same source.
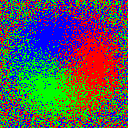
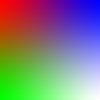
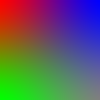
  And we'll use this HSL colorwheel to give a fuller picture of the gamut, in place of the gradient image.
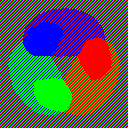
Finally, we’ll also want to make a palette image to use in our calculations. (This will let us swap out the palette for something else later.)
$ magick -size 1x1 xc:red xc:lime xc:blue +append RGB.gif(Note that for compatibility reasons, “lime” is the brightest green color in ImageMagick, and “green” is only half as bright.)
Thresholding and Random Thresholding
These work about the same as in grayscale.
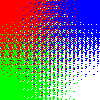
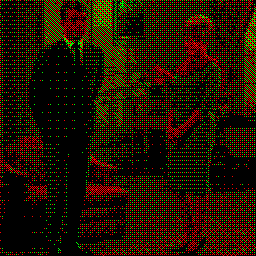
$ magick birds.png -dither None -remap RGB.gif birds_threshold.png
$ magick birds.png -fx 'u+0.5-rand()' -dither None -remap RGB.gif birds_random.png
$ magick colorwheel.png -dither None -remap RGB.gif colorwheel_threshold.png
$ magick colorwheel.png -fx 'u+0.5-rand()' -dither None -remap RGB.gif colorwheel_random.png


Note that for a color image, the -fx operator works on each channel independently, so there are effectively three different noise maps (red, green, and blue). Also notice that we disable ImageMagick’s automatic dithering options with -dither None in order to implement our own. (I may do this more often than strictly necessary.)
Random dither is still non-deterministic. If we animate it, the same “crawling” effect occurs.
Ordered Dither by Channel
The built-in ImageMagick ordered dither works for color reduction, to a point. It operates on each channel separately and then recombines them. Especially with adjustment and tuning, it can get great results. But it can’t actually dither to an arbitrary palette. At the lowest level, it will always have at least 8 colors: the three in your palette, the three secondaries, “black,” and “white.”
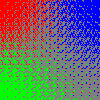
$ magick colorwheel.png -ordered-dither o8x8,2 colorwheel_posterize_2.png This looks really good! But it has 8 colors.
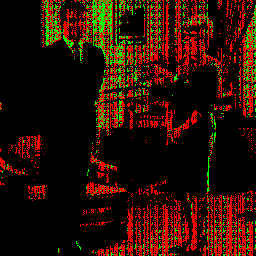
The obvious way then to get a three-color ordered dither is to dither as necessary and then remap the colors afterwards. But not only is this inelegant, it introduces unnecessary distortions that you can see in the color wheel image.
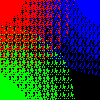
$ magick colorwheel.png -ordered-dither o8x8,2 -dither None -remap RGB.gif colorwheel_remap.png Notice how the red and green 'slices' of the wheel are significantly blue.
Latin Cube Pattern
Therefore, it would be desirable to directly dither an image into a three-color palette. If a grayscale threshold map is a kind of pre-computed noise, I reasoned that a 3x3 pattern with every combination of channel intensity could serve the same purpose. This one was constructed from a 3x3x3 Latin cube.
P3
3 3
4
1 2 3
2 3 1
3 1 2
2 3 1
3 1 2
1 2 3
3 1 2
1 2 3
2 3 1
The PPM (portable pixmap) format is a NetPBM format like PGM was, but it can encode color as well.
![]() The Latin cube pattern, blown up. As with a grayscale threshold map, no pixel is purely white or black in any channel.
The Latin cube pattern, blown up. As with a grayscale threshold map, no pixel is purely white or black in any channel.
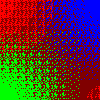
$ magick birds.png latin.ppm -virtual-pixel tile -fx 'u+0.5-v' -dither None -remap RGB.gif birds_latin_RGB.png
$ magick colorwheel.png latin.ppm -virtual-pixel tile -fx 'u+0.5-v' -dither None -remap RGB.gif colorwheel_latin_RGB.png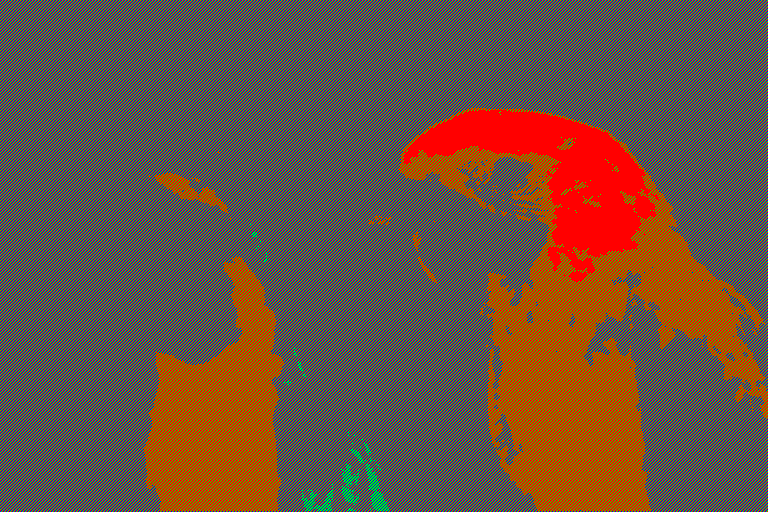
It only works OK. As a 3x3 pattern, it’s impossible to color any three pixels in different rows and columns and not form a diagonal line when tiled, which is especially apparent at lower resolutions. (It also uses the same pattern for “white” and “black,” which flattens the image, but this is a palette issue.)
Color Bayer Pattern
What if I could assign each combination of channel values to a greyscale value in the original Bayer matrix? This would hopefully give me “more” and smoother colors.
Conveniently, , so if each channel has values from 1 to 4 (these get normalized to 0 to 1 later), this mapping should be easy. Assuming that the “intensity”3 of a pixel is proportional to the sum of its channels, I ranked each of my 64 colors by intensity (breaking ties channel 1 first, then channel 2) and mapped them to the original 8x8 pattern. The result was o8x8x3.ppm, but I’ve blown it up here to illustrate.

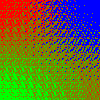
$ magick birds.png o8x8x3.ppm -virtual-pixel tile -fx 'u+0.5-v' -dither None -remap RGB.gif birds_o8x8x3_RGB.png
$ magick colorwheel.png o8x8x3.ppm -virtual-pixel tile -fx 'u+0.5-v' -dither None -remap RGB.gif colorwheel_o8x8x3_RGB.png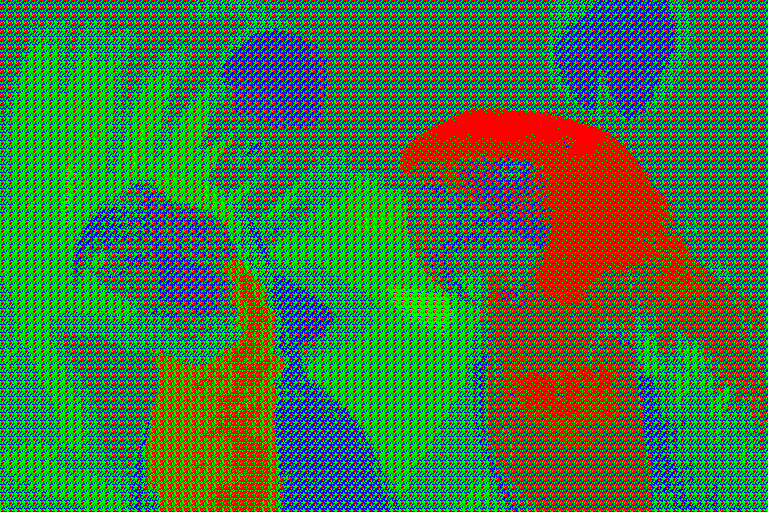
This one has pretty good results! Like the Latin cube pattern, it still can’t differentiate between “white” and “black,” but by adding more colors we’ve reduced the range where that’s relevant. Like the grayscale ordered dither, this is similar to random dither in quality, but easier to look at because of the repeating patterns.
Playing Around
What can we do with this?
Arbitrary Palettes
The math was somewhat simplified by our palette colors matching our channel colors. But this is simple to fix, we only have to understand that in each channel our noise has to be over the extent of the values in that channel (the maximum minus the minimum), and the threshold is at half of that extent (all offset by the minimum value). We can rearrange this to be a little cleaner:
Where is the value of the current pixel of the source image in one channel (from 0 to 1), and are the maximum and minimum values of that channel in any of the palette colors, and is the offset of the current pixel (for a random dither, a random value between 0 and 1, for an ordered dither the corresponding value of that pixel in the dither pattern).
So for example:
$ magick -size 1x1 xc:cyan xc:magenta xc:yellow +append CMY.gif
$ magick birds.png CMY.gif o8x8x3.ppm \
    -virtual-pixel tile -dither None \
    -fx "u+(v.maxima-v.minima)*(0.5-u[2])-v.minima" \
    -remap CMY.gif \
    birds_o8x8x3_CMY.png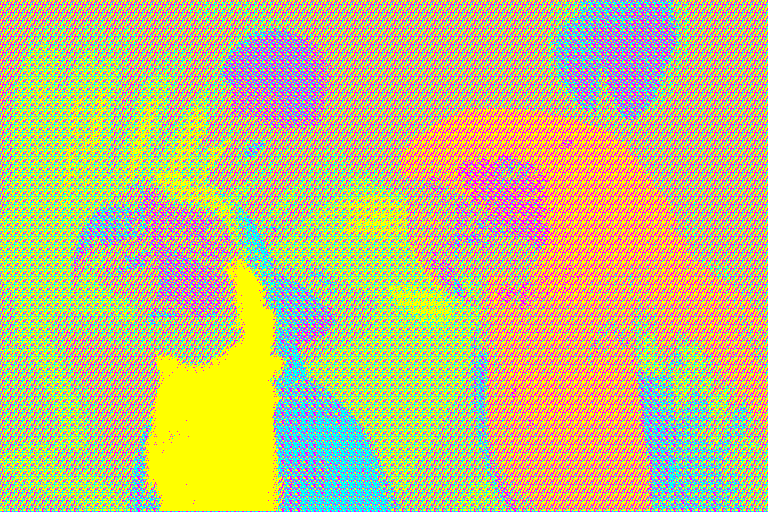
Note that strictly speaking, depending on the palette, this probably invalidates the assumptions I had made about mapping “intensities” in the ordered dither pattern, but that’s OK because I’m in this for the funky patterns and not for the ideal smooth compression of an image.
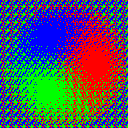
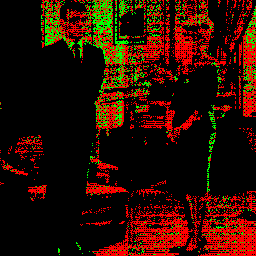
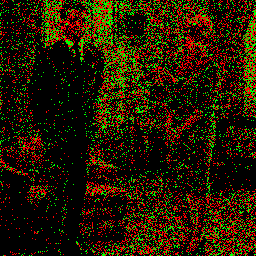
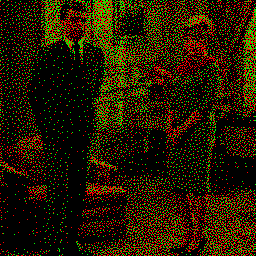
Given all this, I want to use an “asymmetric” palette for the remainder of these examples. I’ve chosen a red-green-black palette because including a less-saturated color (in this case, black) allows for a distinction to be made between black and white. Other palettes can also be quite striking, including red-white-black, and red-green-navy.
$ magick -size 1x1 xc:red xc:lime xc:black +append RGK.gif
$ colorwheel.png RGK.gif o8x8x3.ppm \
    -virtual-pixel tile -dither none \
    -fx 'u-v.minima+(v.maxima-v.minima)*(0.5-u[2])' \
    -remap RGK.gif \
    colorwheel_o8x8x3_RGK.png
$ birds.png RGK.gif o8x8x3.ppm \
    -virtual-pixel tile -dither none \
    -fx 'u-v.minima+(v.maxima-v.minima)*(0.5-u[2])' \
    -remap RGK.gif \
    birds_o8x8x3_RGK.png
The color wheel in a red-green-black palette. Notice that the center is now distinct from the perimeter.
  The ability to vary brightness across the image immediately improves the image quality.
Quaternary Palettes
Because the extent of the noise added is limited by the whole color palette, not by the specific channel colors, this works for 4-color palettes and larger too, … sort of.
for S in white gray50 black maroon yellow olive ; do \
magick \( xc:red xc:blue +append \) \
    \( xc:lime xc:$S +append \) -append \
    -filter point -interpolate catrom \
    -define distort:viewport=100x100 \
    -distort Affine '.5,.5 .5,.5   1.5,1.5 99.5,99.5' \
    -write "gradient_${S}.png" \
    \( -size 1x1 xc:red xc:blue xc:lime xc:$S +append -write "palette_${S}.png" \) \
    'o8x8x3.ppm' -virtual-pixel tile -dither None \
    -fx 'u-v.minima+(v.maxima-v.minima)*(0.5-u[2])' \
    -remap "palette_${S}.png" \
    "gradient_${S}_dither.png" ; \
done
|
|
|

|
|
|
|
|
|
|

|
|
If the fourth color is strongly saturated (black, white, and yellow in these examples), it will “hold its own” and stay flat in the thresholding. If it isn’t (gray50, maroon, and olive in these examples), regions that should be purely that color will tend to have other colors mixed in. But conversely, it will also “take territory” from its nearest neighbors as well.
Other Color Dithering Patterns
If we sacrifice our desire for a “balanced” dither, we can use any brightly-colored image as a dither pattern.
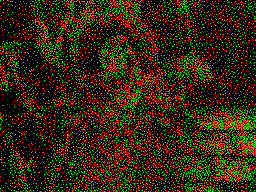
 In order to better see the impact of the dither patterns, I am also switching to a smaller, color version of the first test image.
$ magick couple2.tiff RGK.gif o8x8x3.ppm \
    -virtual-pixel tile -dither none \
    -fx 'u-v.minima+(v.maxima-v.minima)*(0.5-u[2])' \
    -remap RGK.gif \
    couple2_o8x8x3_RGK.png
For a baseline, this is the o8x8x3 pattern from above in the red-green-black palette.
Rolled Grayscale Patterns
We can duplicate a grayscale threshold map twice, and roll each copy by some fixed amount, then turn each map into a channel.
$ magick o8x8.pgm \( +clone -roll +1+0 \) \( +clone -roll +1+0 \) -combine -set colorspace RGB o8x8_roll1.png
$ magick o8x8.pgm \( +clone -roll +2+0 \) \( +clone -roll +2+0 \) -combine -set colorspace RGB o8x8_roll2.png
$ magick couple2.tiff RGK.gif o8x8_roll1.png \
-virtual-pixel tile -dither none \
-fx 'u-v.minima+(v.maxima-v.minima)*(0.5-u[2])' \
-remap RGK.gif \
couple2_o8x8_roll1_RGK.png
$ magick couple2.tiff RGK.gif o8x8_roll2.png \
-virtual-pixel tile -dither none \
-fx 'u-v.minima+(v.maxima-v.minima)*(0.5-u[2])' \
-remap RGK.gif \
couple2_o8x8_roll2_RGK.png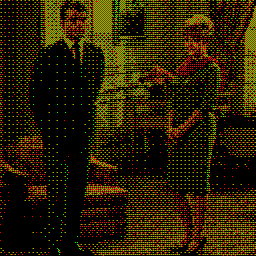
Glitches
We can tile our dither pattern a few times to make a larger image, glitch that image with a tool like PNGlitch and use the valid results as dither patterns. 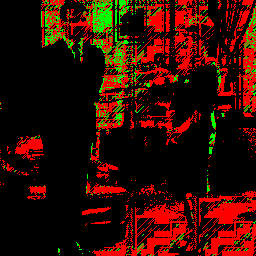
White Noise
If we wanted to keep the grainy look of a random dither but keep it fast to compute and deterministic, we could dither with a pre-computed texture of white noise.
It’s worth cautioning here that because of the way white noise clusters and gaps, tiling with the same white noise will look odd if the picture is significantly larger than the pattern.
Rainbow Fill
If you take your white noise, and blur it and squish it and some other stuff,4 you can make it into a wobbly rainbow pattern, reminiscent of KidPix and other early paint programs.
 As a dither pattern, it has a tendency to wipe out the underlying image. However, with a well-chosen palette and the right base image, it can produce a strong 'water damage' effect.
Rainbows
Our pattern need not be square, any rectangle will tile.
$ magick -size 1x8 xc:red -colorspace HSB gradient: -compose CopyRed -composite -colorspace RGB -rotate 90 rainbow.png This pattern too, has mostly obscured the base image, but you can still make out the silhouettes of the figures. Again, with the right palette and base image, I wouldn't discount it completely.
Blue Noise
Blue noise is a lot like white noise. It has to be pre-generated to use as a pattern, but it has relatively ideal mathematical and optical qualities for dithering. Furthermore, it doesn’t have the same clumping problem as white noise, so it tiles well. It received a lot of attention when dithering was briefly popular again around 2016. Before that, it was too difficult to compute. Christoph Peters has a really good explanation of it and a lot of free blue noise patterns on his website.
Technicolor
I suspect one reason this area isn’t so well-developed is that there aren’t many use cases for “more than two but fewer than eight” colors. But one historical example is early film. Contrary to common belief, early film was full of color. Of particular interest to me here is early technicolor, which used a “two-strip” process encoding red and green separately. This is similar to the red-green-black palette that we’ve been using already! So with that in mind, I dithered this short clip from Phantom of the Opera using a blue noise pattern. (The size is perhaps not optimized.)
Conclusion
This idea has been burning a hole in the back of my mind for at least a year now. I don’t plan to expand it further, but I also don’t see myself putting it down soon.
Future Work
More complex code could run the process in reverse: threshold and then map flat regions to patterns, instead of applying a pattern and then mapping pixels to colors. It’s unclear to me if this is always mathematically equivalent, but certainly you could produce more exact patterns in this way.
Similarly, mapping patterns to pseudo-colors would allow more exact quaternary (and arbitrary) dithering.
Finally, I have done nothing to maintain brightness or correct gamma or anything of that sort. Someone looking to write a more useful implementation than this would have to spend a lot of time wrestling with these concepts.
Further Reading
ImageMagick Examples — Color Quantization and Dithering
by Anthony Thyssen. This is the best, most comprehensive, and practical guide to color reduction that I’ve read. ImageMagick is an accessible tool that’s easy to follow-along with, and this document has been my go-to resource since I started playing with it. This whole post was inspired specifically by the “future possibilities” noted at the end. The Ordered Dither Upgrade notes are also instructive.
Ditherpunk — The article I wish I had about monochrome image dithering
by Surma. A really good and complete history of dithering, with intuitive explanations of many methods.
An optimum method for two-level rendition of continuous-tone pictures (PDF, archived)
by Bryce Bayer. This is kind of the origin of ordered dithering on a computer. The math is a little dense in places, but it really helped me think about more flexible methods.
Joel Yliluoma’s arbitrary-palette positional dithering algorithm
by Joel Yliluoma. If you wanted to do a ternary dither and make it look good, this page is where you would start. The examples here are illustrative and the math is exhaustive (complimentary).

Historically, this may have been due to technical constraints like printing technology and file size, but I’m more interested in the aesthetic results.↩︎
Bayer’s original derivation of these patterns is also worthwhile and useful to this project. If random dithering can create unwanted artifacts, these patterns are like pre-calculated noise, designed to minimize those visual frequencies.↩︎
This may or may not meet the technical definition of the word.↩︎
If you are following along at home, those examples still need to be updated for ImageMagick 7.↩︎